Created by
Paul Ojennus, Whitworth University
Nick Budak, formerly Lewis & Clark
Description
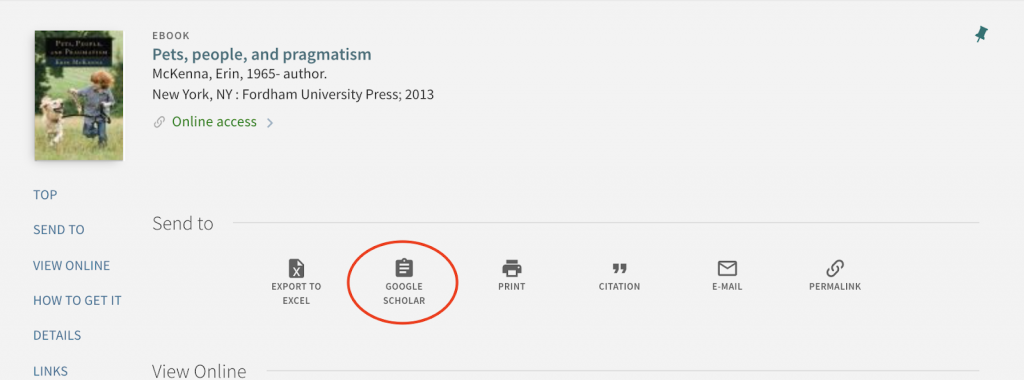
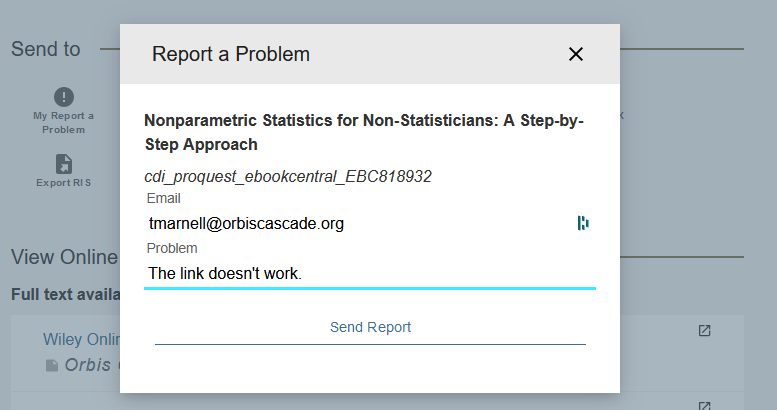
Add custom action such as report a problem, send text message, or view PNX to the “Send to” ribbon in Primo.

System Components
Alma Discovery (VE), Customization Package
Skill Set Requirements
Alma Discovery Customization Package, Javascript
Accessibility
Not tested
Browser Support
Chrome, Firefox, Safari
Implementation
Overview
- Turn on inheritance from the Central Package.
- Add “customActions” to your app variable.
- Add code snippet describing your custom action to the main body of your custom.js file.
Steps
- Turn on inheritance from the Central Package.
- In your local custom.js file, add ‘customAction’ to your app variable near the top:
var app = angular.module('viewCustom', ['customActions']);
If you are using other customizations, separate each one with a comma within the brackets:var app = angular.module('viewCustom', ['customActions', 'oadoi']); - Below the “app” declaration (but before the })(); at the end of the file), add a code snippet describing your custom action (this one is for querying Google Scholar by title):
app.component('prmActionListAfter', {
  template: `<custom-action name="google_scholar"
    label="Google Scholar"
    index=1
    icon="ic_school_24px"
    icon-set="social"
    link= "https://scholar.google.com/scholar?hl=en&as_sdt=0%2C38&q={pnx.display.title}" ></custom-action>
  `
})
Your custom action should include the following components:- name: a label within the html describing what it is
- label: the words that will appear in Primo describing the custom action
- index: the placement of your custom action within the row (0 is first, 1 is second, etc.)
- icon: the name of the icon from https://fonts.google.com/icons
- icon-set: the name of the icon-set category, also from https://fonts.google.com/icons
- link: the URL you are opening. You can insert parts of the PNX, like {pnx.search.recordid[0]} for dynamic URLs.
- target (optional): specify whether the link should open in the same window (_self) or a new one (_blank). The default is _blank.
- You can add multiple custom actions: repeat the <custom-action> element in the template and assign a unique name to each action.
- Zip your customization package, and load it to Alma->Discovery->View Configuration->Manage Customization Package
Augmenting the Link with Additional Information
There may be cases where you want to add a custom action, but need data that is not available in the PNX record. In that case, you may need to augment the code in your local custom.js file to locate the additional information, and inject it into your URL.
The following example shows how to augment the code in step 3 to get additional data. This custom action provides a link to the PNX record, but the ‘context’ parameter is needed to construct the URL. The additional/relevant code is in bold:
app.component('prmActionListAfter', {
  template: `<custom-action name="open_pnx"
    label="View PNX"
    index=0
    icon="ic_school_24px"
    icon-set="action"
    link="/discovery/fulldisplay?context={{context}}&docid={pnx.control.recordid[0]}&vid=01ALLIANCE_LCC:LCCCP&showPnx=true" ></custom-action>
  `,
  controller: function($scope){
    var queryString = window.location.search;
    var context = urlParams.get('context')
    $scope.context=context;
  }
})
Since every case is likely unique, feel free to reach out to the Primo Customization Standing Group for help.
Changing the Custom Action Behavior
To create a custom action that triggers a behavior other than opening a link, you can directly call the methods within the customActions factory.
Within the controller of a component, define a custom action object with an onToggle calling a custom function. Use customActions.addAction and customActions.removeAction to trigger the creation and destruction of the action in the Send To ribbon.
this.$onInit = function () {
  // Define the custom action
  _this.my_action = {
    name: 'my_action',
    label: 'My Label',
    index: 0,
    icon: {
      icon: 'ic_error_24px',
      iconSet: 'alert',
      type: 'svg'
    },
    onToggle: _this.showMyDialog()
  };

  // Remove the action if it exists from a previous record
  customActions.removeAction({name: 'my_action'}, _this.prmActionCtrl);

  // Add the custom action
  customActions.addAction(_this.my_action, _this.prmActionCtrl);
}
Write the custom function to perform the behavior you want, for example, to open a modal dialog.
this.showMyDialog = function showMyDialog() {
  return function() {
    $mdDialog.show({
      controller: myDialogController,
      clickOutsideToClose: true,
      escapeToClose: true,
      template: '<md-dialog id="myFormDialog">(my content)</md-dialog>'
    });
  }
}

function myDialogController($scope, $mdDialog) {
  // My functions for the dialog behavior
}
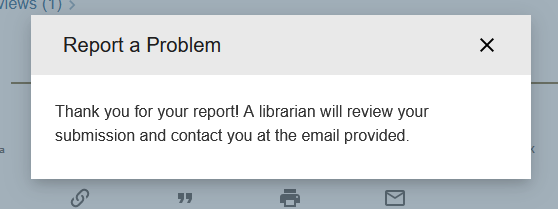
A complete working example is available at: Custom Action Dialog. This demo will add a Report a Problem action that opens a form in a dialog, submits the form to a remote server, displays a confirmation message, and prints the server response to the console.


